
In this tutorial, we will learn about Python Virtual Environment (also referred to as virtualenv). We will cover installation of required packages as well as how to use virtual environments for development process.
1. What is Virtual Environment?
A python virtual environment is an isolated working copy of Python. It allows us to work on a specific project without worry of affecting other projects. It created an isolated installation of python which does not affect any other environment being set up. Multiple virtual environments can co-exist.
It does not actually install separate copies of Python but provides a clever way to keep different project environments isolated.
We can have multiple versions of Python for different projects without any dependency clashes. All the virtual environments can have their own independent modules and dependencies without any effect on other environments.
2. Prerequisites
The very first thing we need on our system is Python. If you are on MacOS then Python is already installed. If you are on any other OS, you might need to download and install Python from the official website.
Once Python is on the system, second thing we will need is pip which is the package manager for Python. It comes with Python versions 2.7.9 or newer. Pip document explains how to install it, refer to the document here
2.1 Checking if both Python and Pip are ready for use
To make sure that Python and Pip are available and ready for use, we can use version commands:
python --version
This commend is just to check the version of python but it will also make sure that python is properly installed and ready to use. If there is any issue with installation, there will be no version information available. It should display the output something similar to the screenshot below.

pip --version
Once we know python is ready to use, we will check the version of pip also. Keep in mind we are not looking for any specific version information but just using this command to see if the version information is displayed which also make sure that the installation was successful.
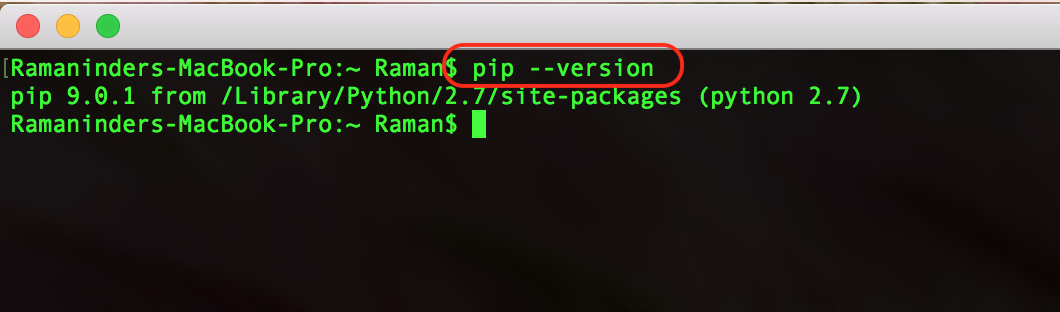
If both Python and Pip return proper version information as shown in the screenshots above, we can be sure they are available for use.
3. Working with Python Virtual Environment
Once we have Python and Pip ready, we are ready to install virtual environment package and start using it for our development purposes.
3.1 Installing Virtualenv packages
We will need virtualenv package in order to enable us to use virtual environments. Use the following steps to install the package:
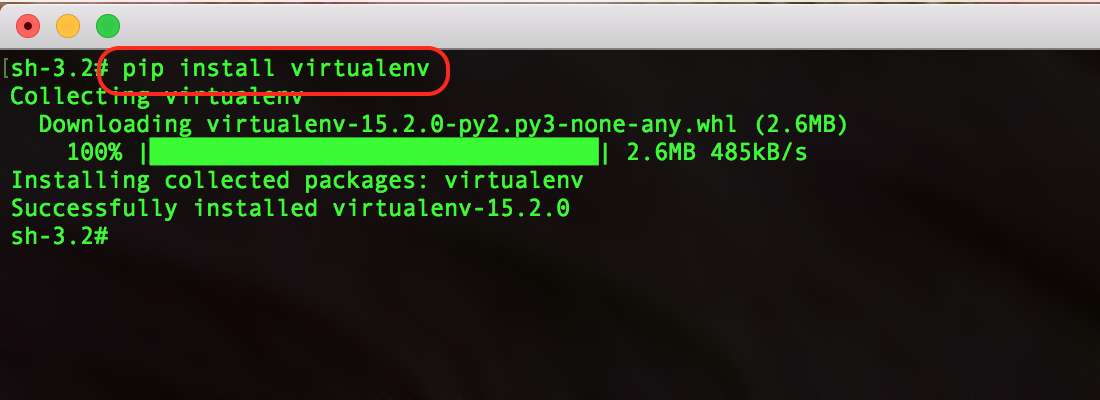
pip install virtualenv
This command should successfully install the latest version of virtualenv and the output should be similar to the one in the screenshot.
Once this is done, to check if everything is fine and virtualenv is available, we will check the version using:
virtualenv --version
Now from here, we are done with the installations and are ready to use virtual environment. We will cover the most common options you will need to know for using virtual environments in python.
3.2 Using Virtualenv
Following are the steps to create a virtual environment using just the virtualenv package without using any wrapper:
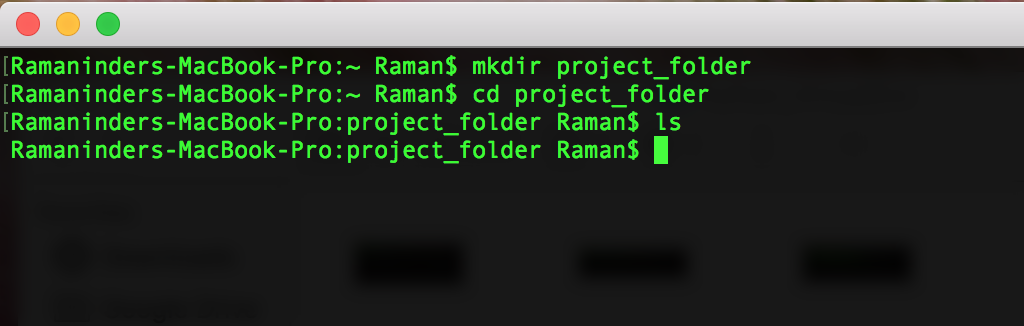
Let’s assume we have a folder project_folder where we want our virtual environment stored.
mkdir project_folder

cd project_folder
Next, the following command will create a new folder in the current directory with the name ENV and this folder will contain python executable files and a copy of the pip library.
virtualenv ENV
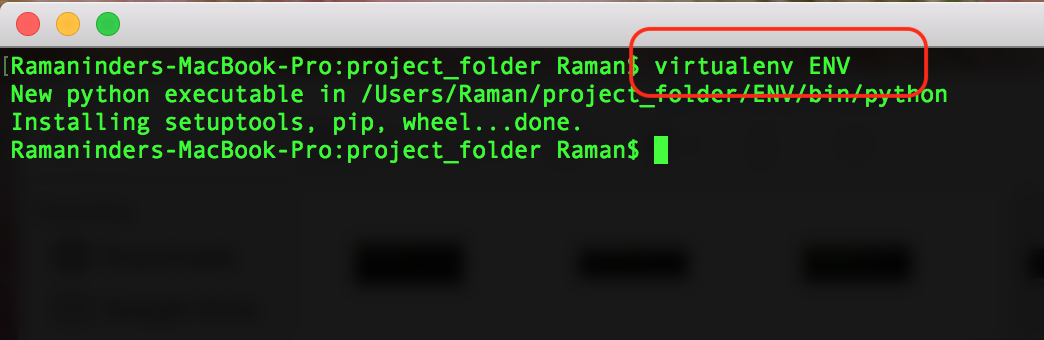
This will create a copy of python in the folder project_folder (or whichever folder you ran the command in) and will place all the environment files in the folder project_folder<ENV
NOTE: In case you want to use a specific version of Python, we can pass it to the command as a command parameter:
virtualenv -p /path/to/the/python2.7 ENV
To begin using the virtual environment, it needs to be activated. Following command can be used for that:
source ENV/bin/activate
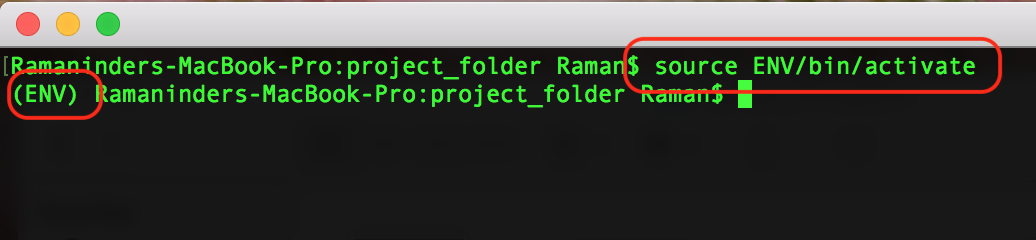
The name of current virtual environment will now appear on the left of the prompt to let us know that it is active. Once an environment is activated, whatever package or library we will install using pip will be placed in the project_folder/ENV/ and will be isolated from the global python installation.
Once we are done using the environment and need to close it, we can simply use the following command:
deactivate

It will deactivate the current virtual environment and we will be back in the global space with default python interpreter.
4. Final Thoughts
In this post, we looked at the step by step guide about installing and using virtual environments for python development. Getting used to using different virtual environments for different projects can save us a lot of time later on in case there are any conflicts in the package requirements of the projects.
It is an important piece of information to know and I hope more and more people start using virtual environments for development.